How to Connect LinkedSDR Representatives to Expandi

LinkedSDR representatives work seamlessly with leading automation platforms. Expandi is our recommended integration for agencies managing multiple LinkedIn profiles due to its enterprise-grade infrastructure, dedicated IP addresses per account, and agency-focused features.
This guide covers the complete integration process, from initial setup through optimization best practices.
About LinkedSDR Representatives
LinkedSDR provides real LinkedIn representatives who work as independent contractors using their own established accounts. Each representative operates through a Secured Rep Workspace (professional infrastructure including GoLogin, proxies, and anti-detection systems) to ensure 90%+ operational uptime.
What you're connecting to Expandi:
- The representative's LinkedIn account (their real, established profile)
- Accessed through professional infrastructure (Secured Rep Workspace)
- Supported by 48-hour replacement guarantee
This guide covers the technical process of connecting these LinkedIn profiles to Expandi for campaign management.
Why Expandi for LinkedSDR Representatives
Expandi's architecture aligns with professional LinkedIn infrastructure requirements.
Technical Foundation:
- Dedicated local IP per account prevents cross-account detection
- Cloud-based operation maintains consistent geographic authentication
- Auto-relogin capability ensures continuous operation
- Enterprise-grade security with credential hashing
Agency Operations:
- Unlimited accounts for flat fee ($999/month up to 50 senders)
- Unified inbox manages all profile conversations from single dashboard
- White-label customization for client-facing delivery
- Integration with Zapier, Clay, Apollo, HubSpot, Pipedrive, major CRMs
Complete Tutorial: Connecting Your LinkedIn Profile to Expandi
The following tutorial is provided directly from Expandi's official documentation and is reproduced to ensure accuracy and completeness.
Source: Expandi Help Center - "How to connect my LinkedIn account to Expandi?"
Step 0: Access Expandi Through Your Secured Rep Workspace
Critical First Step: Before connecting your LinkedIn profile to Expandi, you must access the Expandi platform through your GoLogin browser that's configured for your LinkedSDR representative (part of the Secured Rep Workspace).
Why This Matters:
- Maintains consistent browser fingerprinting and IP location
- Prevents LinkedIn from detecting unusual access patterns
- Ensures seamless integration without triggering security alerts
Setup Process:
- Launch your GoLogin browser (part of your Secured Rep Workspace)
- Navigate to Expandi.io within this secured browser environment
- Log into your Expandi account using the secured session
- Proceed with LinkedIn profile connection following the official Expandi instructions
Note: The complete step-by-step connection process (creating Expandi account, connecting LinkedIn credentials, 2FA setup, and subscription activation) is available in Expandi's official documentation at help.expandi.io. Follow their detailed tutorial for the technical connection steps.
How to create a new user account on Expandi?
To create an account on Expandi, please go to the Expandi sign-up page and follow the steps below:
- Once the sign-up page is opened, please enter your first name, last name, user email address (you will be using to log in to Expandi), create a password, and confirm the password by entering it again.
- Make sure that the created password is at least 8 symbols long, is not similar to the username, is a mix of letters and numbers, and is not too 'common'.
- Once it is done, select the account type - if you will be using Expandi for your own company or personal goals, or if you will be using Expandi only for your clients and partners.
- Read the terms and conditions, and make sure that you fully agree with them before checking the box to confirm.
Click on the Sign-up button to finish the registration.
Sign up with Google
Alternatively, you can use the option to Sign Up with Google. If you click on the 'Sign up with Google' button, a screen with your Google (Gmail) email addresses will appear. You should then click on the email address you'd like to use for the Google sign-up and you'll successfully sign up to Expandi with the selected Google email address (account).
How to log in to Expandi with a new user account?
Once the user (account) is activated, please click here to log in. Then enter the login credentials you created, or if you signed up with Google, click on the 'Sign in with Google' option instead.
If you have your password stored in your Chrome profile, you can click on the 'Password' field. You'll see a drop-down list with the credentials saved.
Keep in mind that if you already have an account with us, you should fill in your credentials in the Log-in section rather than the Sign-Up section.
Once you are in, you will need to connect your LinkedIn account to Expandi to start your free trial (subscription) and the outreach.
Create a Workspace
The first thing you'll have to do whenever you log in to your new Expandi account is to create the name for your workspace. Once that's done, click on the 'Next' button to continue.
You can learn more about creating workspaces here and how to use them here.
How to connect your LinkedIn account to Expandi?
Once the workspace is created, the next thing you'll have to do is connect your LinkedIn account to Expandi.
To connect your LinkedIn account with Expandi, please follow the steps below:
1. Connect your LinkedIn account by clicking on the 'Add your LinkedIn account with Chrome extension' button, OR by entering your LinkedIn account login credentials (LinkedIn email address + password).
To avoid disconnections of a LinkedIn account and keep it connected to Expandi, it's recommended to check the 'stay logged in' box before moving on to the next step.
Note: If you connect your LinkedIn account using the Chrome extension and later change your LinkedIn password, you'll need to enter your new password in the system. Login via extension is only used when first adding your account — it doesn't replace the regular way of connecting to your LinkedIn without using your password.
Click on the 'Confirm and continue' button to move to the next step:
2. Select the country from which you are using your LinkedIn account. This will give your account a dedicated IP address. If you wish to use a custom proxy, please click on the little square next to 'Use custom proxy' to enter the details! Please learn more about it here. Once the country is selected, click on the Next button.
3. Activate LinkedIn two-step verification. On this step, you will have to select if you already have 2FA enabled ('Yes, I have 2FA enabled') on LinkedIn or if you don't ('I don't have any 2FA'). Having 2FA on for your LinkedIn account and finishing these set-up steps on Expandi and LinkedIn is very beneficial; this will ensure that your LinkedIn account will stay connected, and you won't need to reconnect it whenever LinkedIn requests for a PIN from the authenticator app.
You can do this in this step or click on the 'skip for now' button and do it later in the 'LinkedIn settings -> General settings' section on Expandi. All steps can be found here.
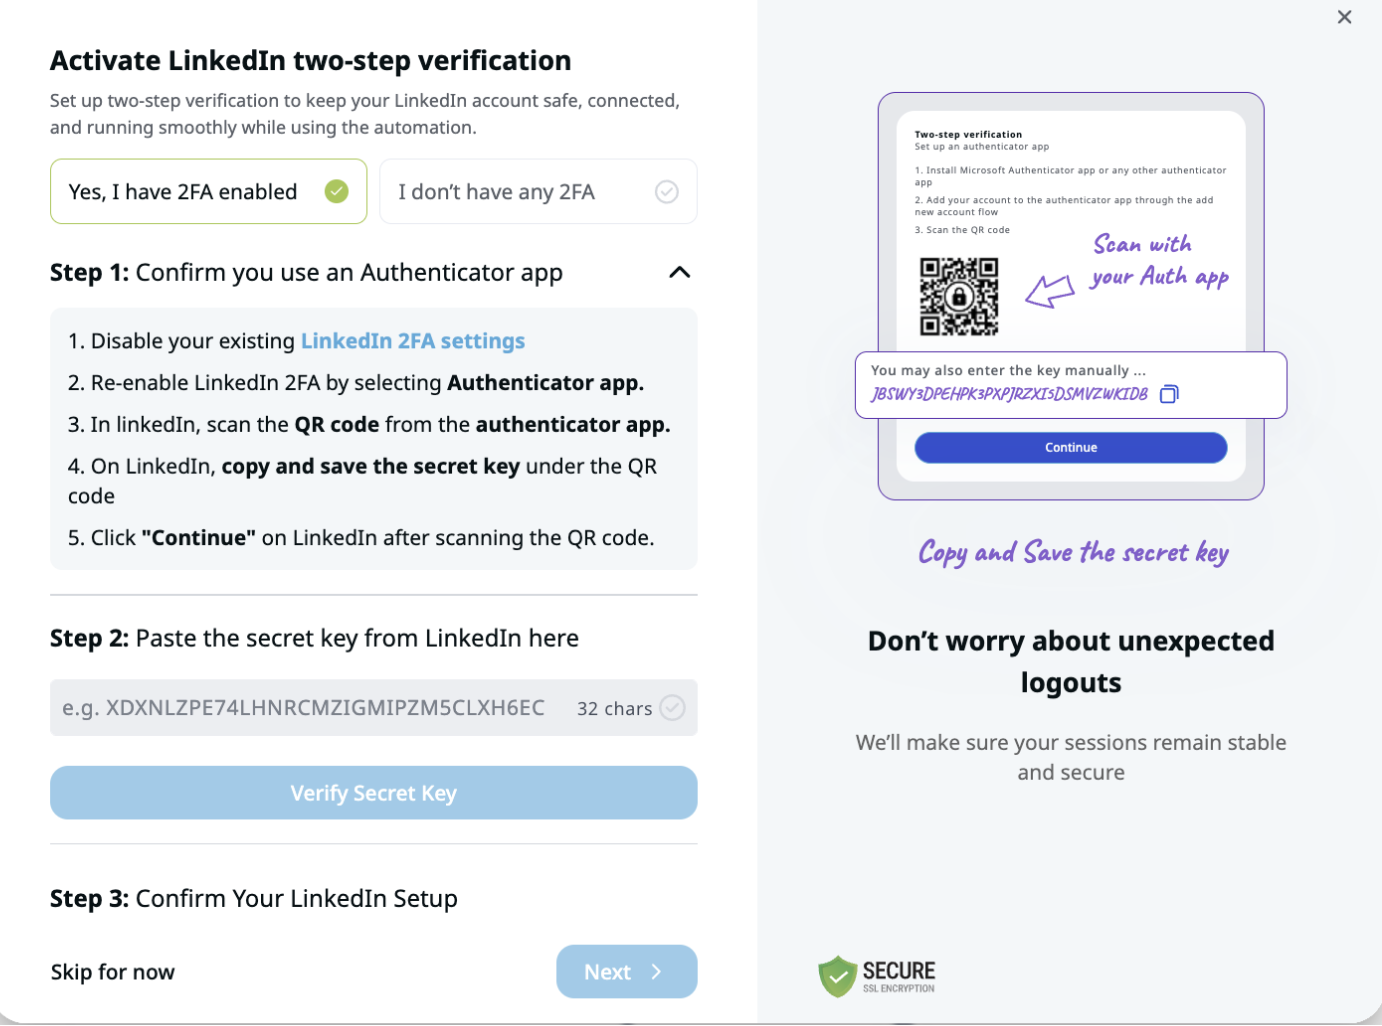
If 2FA is already enabled on LinkedIn:
Click on the 'Yes, I have 2FA enabled' button and follow the steps below to turn off existing 2FA and turn it back on.
Once you have the key copied from LinkedIn, paste it in the box below and click 'Verify Secret Key':
Return to LinkedIn to complete your 2FA set-up there. This includes scanning the QR code with your authenticator app (so you can find the PIN in the authenticator app) and finishing the rest of the steps there (shown in the video above). Then, go back to Expandi and click on the 'I've completed the 2FA setup on LinkedIn' button.
'Step 3: Confirm your 6-digit PIN.' Make sure this matches the PIN shown in your authenticator app (next to your LinkedIn email address there). This is crucial; if the code doesn't match and you still confirm that it matches, the integration later on won't work. Therefore, make sure that the code you see on your authenticator app and Expandi match (is the same).

If the pin displayed on Expandi and your authenticator app match, click on the 'Confirm this code matches with phone' button to confirm.
If the pin displayed on Expandi and your authenticator app don't match, click on the 'Code doesn't match' button. This might happen if the secret key entered is incorrect (or the mistake was made when entering it). In such a case, click on the 'Restart' button in the 'Troubleshooting tips' section, and you'll be brought to 'Step 1' to redo the setup.
If the pins match and you click on the 'Confirm this code matches with phone' button, the pin (code) will be validated. Now click on the 'Complete' button, and 2FA will be connected.
If 2FA is not enabled on LinkedIn:
Click on the 'I don't have any 2FA' button and follow the steps mentioned in the 'Step 1:' section. You can click on the 'LinkedIn 2FA settings', which will take you straight to the 2FA set-up on LinkedIn.
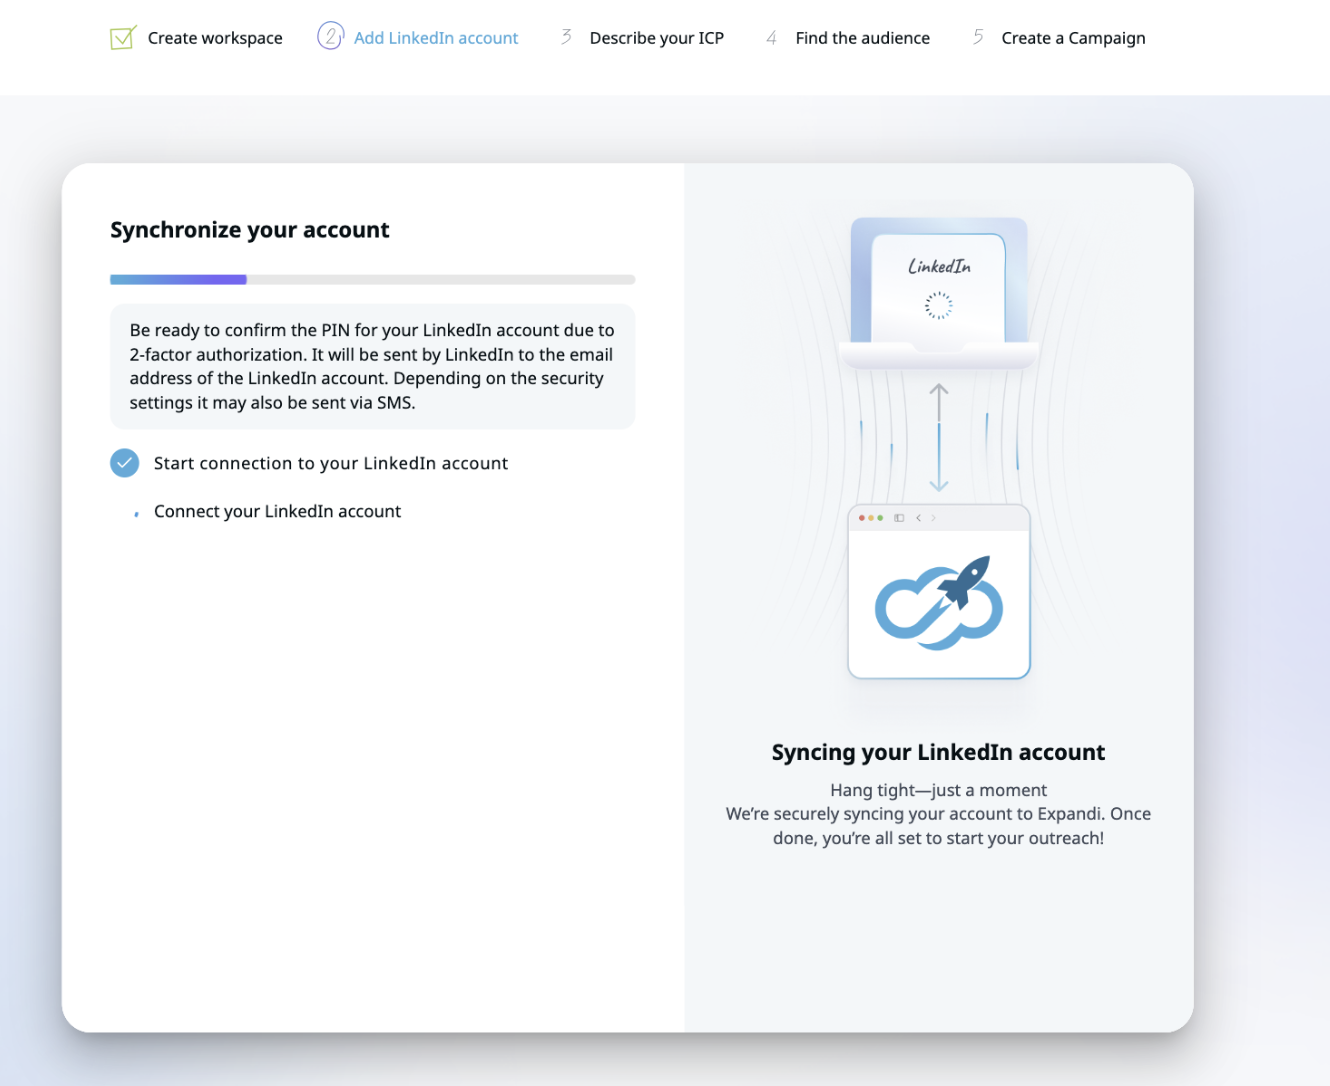
4. In the next step, you will need to activate (create) a subscription or a trial. Select the plan, the number of seats you'd like to purchase with this subscription, add your bank card details and your billing email address and details, and click on the 'Start trial' button. If you have a voucher code or discount/coupon code, you can add it to the "Code" field. Once the subscription is successfully created, the system will start syncing your LinkedIn account with Expandi. Now you need to wait for a couple of minutes until all of your LinkedIn data (connections, messages, etc.) is synchronized to your Expandi account.
PIN required
During the synchronization, you might need to enter a PIN from LinkedIn that will be sent to your LinkedIn email address, your phone number, or the authenticator app, depending on the security settings (2-FA) on LinkedIn. Please learn more about the PIN here.
New password required
Also, if you made a mistake when entering your LinkedIn account's credentials, a window will appear that says incorrect credentials. In such a case, you'll have to double-check your LinkedIn account login credentials on LinkedIn and provide the correct ones to continue.
Once all the required information is provided, the LinkedIn account will be fully synced and connected to Expandi! Please see the tutorial videos on how to start using Expandi here.
Campaign Optimization Strategy
A/B Testing Protocol:
- Test 50-100 prospects per message variation
- Track acceptance rates, reply rates, and reply quality
- Document what resonates with specific ICP segments
- Scale only proven high-converting approaches
Advanced Targeting Methodology:
- Use Expandi's filtering by job title, company size, location, and industry
- Layer multiple filters for precision targeting
- Create separate campaigns for different buyer personas
- Monitor performance by segment for optimization insights
Performance Monitoring:
- Track daily: Connection acceptance rates (target: 20-25%)
- Track weekly: Message response rates (target: 30%+ of accepted)
- Track monthly: Meeting conversion and pipeline contribution
- Review campaign analytics before adjusting approach
Multi-Channel Integration
Expandi supports omnichannel outreach combining LinkedIn and email. After completing email integration setup:
- Coordinate LinkedIn and email touchpoints for unified sequences
- Use different channels for different campaign stages
- Maintain consistent messaging across channels
- Track attribution by channel for ROI analysis
Setup Time Requirements
Single Representative Setup (1-4 representatives)
Process:
- Launch anti-detection browser
- Create Expandi account and workspace
- Connect LinkedIn profile with credentials
- Configure 2FA (if not already enabled)
- Activate subscription
- Complete synchronization
Timeline: 30-45 minutes per representative
Multi-Representative Setup (5-20 representatives)
Scaled Process:
- Create standardized browser configurations
- Document credentials in secure password manager
- Batch create workspaces
- Systematically connect profiles
- Implement unified campaign templates
- Establish monitoring dashboard
Timeline: 2-3 hours for 5-10 representatives, 4-6 hours for 10-20 representatives
Ongoing Management
Daily (15 minutes):
- Check connection status across all representatives
- Review security alerts or warnings
- Monitor acceptance rate trends
Weekly (2 hours):
- Analyze campaign performance metrics
- Adjust messaging based on response data
- Update targeting parameters for underperforming campaigns
Monthly (4 hours):
- Comprehensive performance review across all representatives
- A/B test new sequences against control groups
- Optimize daily limits based on 30-day performance data
Frequently Asked Questions
Q: Can I connect multiple LinkedSDR representatives to one Expandi account?
A: Yes. Expandi supports managing multiple LinkedIn accounts from a single dashboard. Each LinkedSDR representative requires its own seat subscription, but you can manage multiple representatives through unified campaign management and a consolidated inbox.
Q: What happens if the integration fails during setup?
A: If credentials are incorrect, Expandi will display an error message. Simply restart the process with correct information, ensuring you're accessing through your anti-detection browser. If 2FA codes don't match, use the "Restart" option in troubleshooting tips.
Q: How long does account synchronization take?
A: Synchronization typically takes 2-5 minutes. During this time, Expandi imports your LinkedIn connections, messages, and profile data. You may need to enter a PIN verification during synchronization depending on your security settings.
Q: Is 2FA setup mandatory for LinkedSDR representative accounts?
A: While not mandatory, enabling 2FA ensures stable connections and prevents disconnections when LinkedIn requests verification. LinkedSDR representative accounts are fully compatible with 2FA setup and we recommend enabling this feature for reliable operation.
Q: Can I modify geographic IP settings after initial setup?
A: Geographic IP settings should match your representative's stated location and generally shouldn't be changed after initial configuration. Inconsistent locations can trigger security reviews. Contact Expandi support for guidance if modifications are necessary.
Q: How do I know if my LinkedSDR representative is properly integrated?
A: Successful integration is confirmed when: (1) account synchronization completes without errors, (2) seat activation succeeds, (3) you can access LinkedIn settings within Expandi, and (4) initial test activities (profile views, connection requests) function normally.
Q: What should I do if I receive LinkedIn automation warnings?
A: Immediately pause all campaigns, reduce daily limits to 10-15 connections, and verify you're accessing through the proper anti-detection browser. Review your messaging for spam-like patterns and ensure geographic consistency. Contact LinkedSDR support if warnings persist.
Q: Can I use Expandi for email outreach in addition to LinkedIn?
A: Yes. Expandi supports omnichannel campaigns combining LinkedIn and email outreach. Complete the email integration setup through Expandi's email configuration options to create unified multi-channel sequences.
Q: Does Expandi integration affect LinkedSDR's replacement guarantee?
A: No. The 48-hour replacement guarantee remains valid regardless of automation platform. If your LinkedSDR representative's account encounters issues, we provide an equivalent replacement that integrates seamlessly with existing Expandi campaigns.
Q: What happens to my data if I disconnect a LinkedSDR representative?
A: Expandi retains conversation history and campaign data after disconnection. When replacing a restricted account with a new LinkedSDR representative, you start with fresh automation setup while maintaining access to previous campaign analytics.
For LinkedSDR consultation on representative requirements: linkedsdr.com/booking
For detailed Expandi connection tutorial: help.expandi.io